Metric Configuration
Metrics are a way to proactively monitor any smart device. They power parts of our Device view such as Device Attributes and the Timeline. You can use them to monitor your releases and view data-driven device and fleet-level Metrics, like battery health, connectivity, and more using Memfault's Metrics features: Metric Charts and Alerts.
Metrics can be marked as Timeseries as well as Attributes, and each option enables a different set of features in the Memfault app.
Defining a Metric
Metrics can be added manually but are also created automatically when devices report them from the field.
Automatically from Memfault's SDK
Here are some useful links if you're looking to enable Metrics collection from your devices using our SDKs:
- for MCU: Collecting Device Metrics using our MCU SDK
- for Android: Built-In Metrics, and Custom Metrics APIs
- for Linux: Linux Metrics
From the Memfault app
You can view all defined Metrics by going to Project Settings → Metrics.

The Metrics view under Project Settings
Each Metric configuration has a few properties:
- a
string_keywhich devices and APIs can use to identify the Metric. Note thatstring_keys are case-insensitive. - in which types of reports metrics exist for the configuration. Metrics in different report types but with the same string key, share the same configuration metadata.
- a
display_name(usually same asstring_key) which will be used as a name across Charts, Alerts and Device Timeline. - whether the data type is an
INT(default),FLOAT,BOOL, orSTRING. - whether it is a
favoriteMetric, which will cause it to appear more prominently in a few places in the web app. - for numeric metrics, the value
rangewhich informs charts and other components, and optionally controls filtering of values. - whether a metric is set as Timeseries and/or an Attribute.
Memfault has default configurations for certain metrics that are well-known or built into our SDKs and may set configuration properties such as Timeseries, Attribute or value range for them upon creation.
Naming Rules for SDK Defined Metric Keys
The requirements for a string to be a valid Metric Key vary between each of the Memfault SDKs. These requirements are as follows:
- Android
- Linux
- MCU
Metric Keys on Android must be nonempty ASCII strings with a length of 128 or less.
Metric Keys on Linux must be nonempty ASCII strings with a length of 128 or less.
Metric Keys on MCU must be nonempty ASCII strings with a length of 128 or less
and adhere to the following pattern: [a-zA-Z_][a-zA-Z0-9]*
Please contact us if you want to use a custom name (display_name) that
is different from the technical id (string_key) reported by the devices for a
metric across Charts,
Alerts and Device Timeline.
Description
You can add a description to each Metric to provide more context to your team about what the Metric represents.
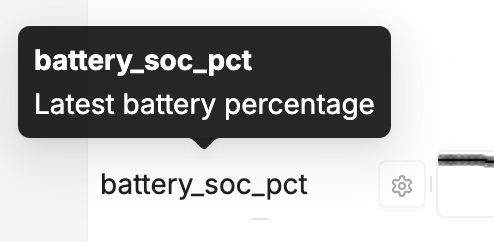
The Timeline will show the description when hovering over a Metric.
Tags
You can add one or more tags to categorize Metrics. For example, you could tag
all metrics related to your battery performance with the tag battery.
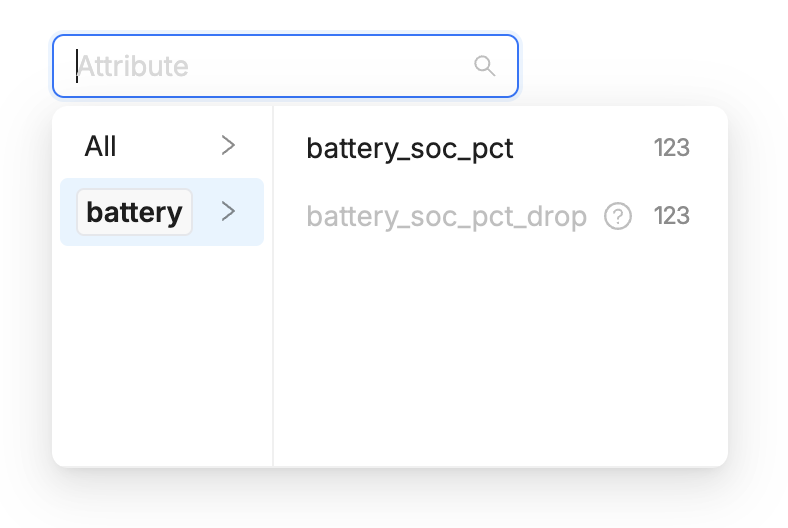
The Metric selection allows browsing metrics by tags.
Tags and Timeline
The Timeline will create panels for each tag. For example, if you have Metrics
tagged with battery and memory, you'll see two panels in the Timeline: one
for battery and one for memory.

Timeline panels are created for each tag.
If a Metric has multiple tags, it will also appear in multiple panels.
Timeseries
By marking a Metric as a Timeseries you'll be able to use it in
Metric Charts and
Alerts. You'll also be able to use them to
search for devices
with a time constraint (e.g. battery_level > 90 anytime last week).
To mark a Metric as a Timeseries, go to Project Settings → Metrics and click Edit on the Metric you're interested in. Then check the Timeseries checkbox.
Attributes
You can store Device Attributes for each of your devices to build a device registry or to manage inventory.
By marking a Metric as an Attribute it will be shown in the Attributes tab on device pages. You'll also be able to search for devices by Attributes on the device list page.
Defining an Attribute
In Project Settings → Metrics you'll be able to mark specific Metrics as Attributes. You can configure this by clicking Edit on a Metric you're interested in, or by creating a new Metric with the Attribute feature enabled.
Device Write Policy
Attributes have a device_write_policy property that controls under which
condition a device can change its value. This does not affect the ability to set
a value manually on the device page.
| Writable |
|
| If not set |
|
| Never |
|
Viewing an Attribute
There are two ways to view Attributes for a device:
- using the web application
- using the REST API
Using the web application
Find the device you want to view the Attributes for (for example by browsing your devices on the Devices page) and select the Attributes tab. You'll see all the properties known for this project and the respective value for the device you're currently looking at.

The device detail page and its Attributes tab
Using the REST API
You can find the documentation and an example request for Retrieving Device Attributes in our REST API Documentation.
Setting an Attribute
There are three ways to write an Attribute:
Because devices can update Attributes, anyone who holds your Project Key can write or overwrite these Attributes.
Using the REST API
You can find the documentation and an example request for Updating Device Attributes in our REST API Documentation.
Using the Web Application
Visit the respective device page as described in Viewing an Attribute. Click on the pencil icon next to the value, enter the new value, and finally Save it.

Editing an Attribute via the web application
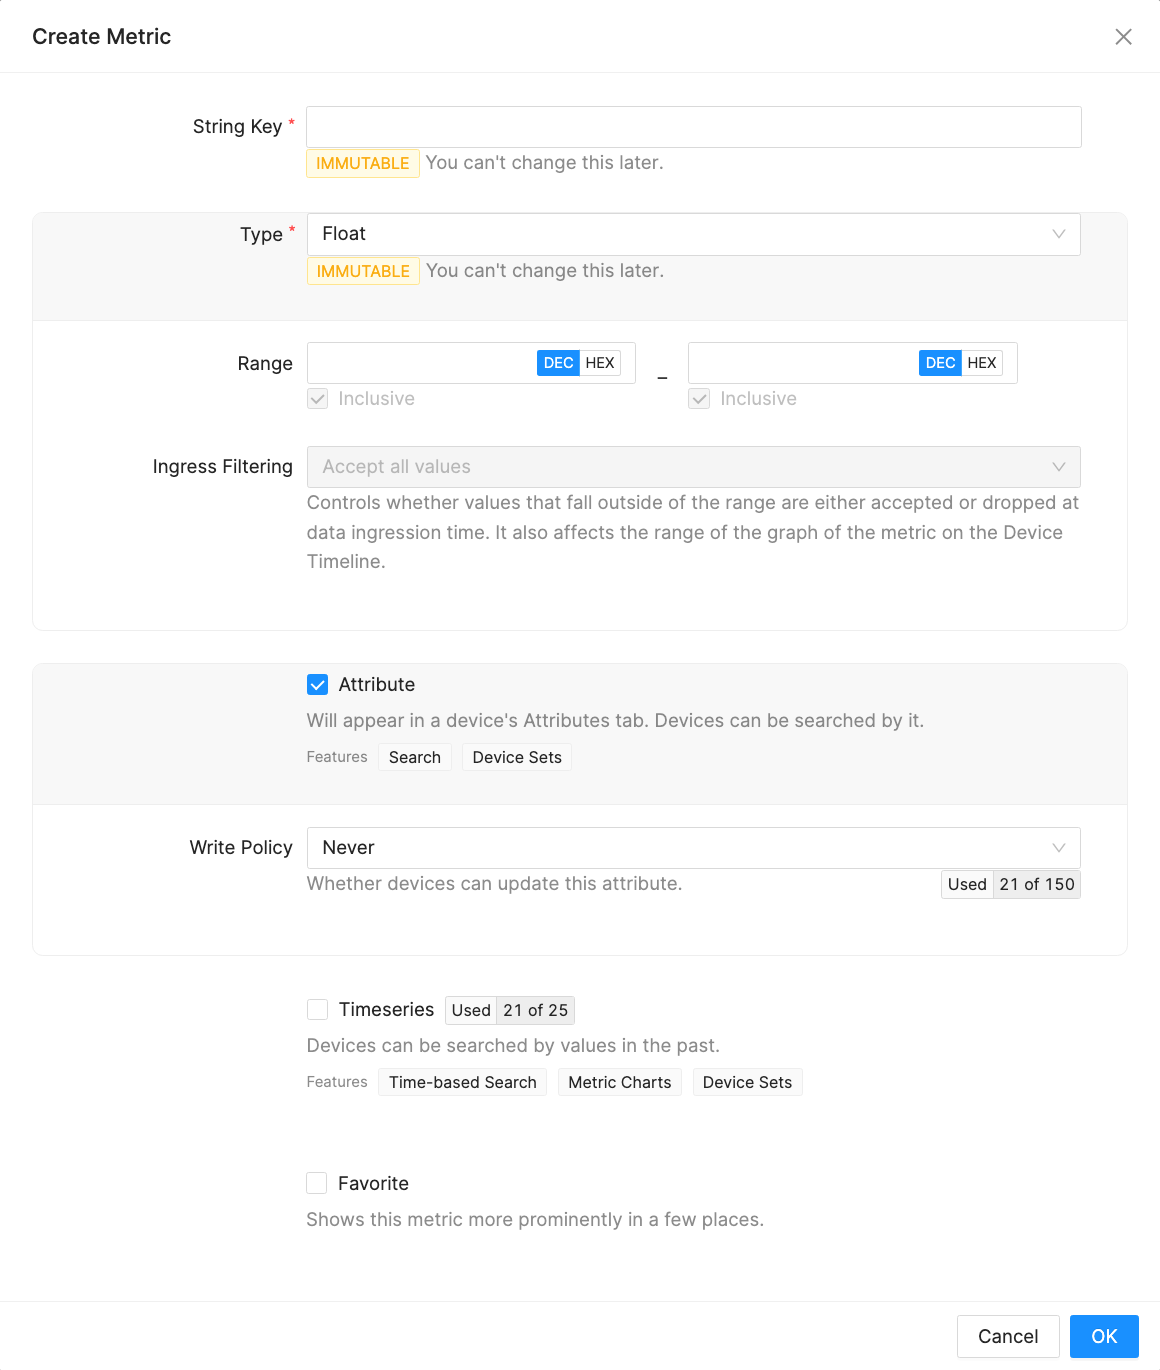
Float/Integer Range
For numeric metrics, the valid range can optionally be specified. For example, for a floating point metric that represents a percentage, you would specify a range of 0 to 100 and make both the start value and end value inclusive:

When specifying only the start of the range, only values greater than (or equal if inclusive) to the start value will be accepted. Conversely, when specifying only the end of the range, only values less than (or equal if inclusive) to the end value will be accepted.
Ingress Filtering
The effect of the range is controlled with the "Ingress Filtering" setting:
- "Accept all values": all values are accepted, regardless of whether they are within the range or not. This is the default for new metrics. The range may be used for display purposes in the future.
- "Accept only values within range": only values within the range are accepted. Values outside the range are ignored for most features in Memfault. See the following table for more details.
Effect of "Ingress Filtering" on out-of-range values, per feature
| Feature | Accept all values | Accept only values within range |
|---|---|---|
| Fleet-wide Metrics charts | 🟢 Included | ⛔ Ignored |
| Device Search | 🟢 Included | ⛔ Ignored |
| Device Threshold Alerts | 🟢 Included | ⛔ Ignored |
| Fleet Threshold Alerts | 🟢 Included | ⛔ Ignored |
| Device Timeline: Heartbeat data | 🟢 Included | ⛔ Ignored |
| Device Timeline: High Resolution Telemetry (HRT) | 🟢 Included | 🟢 Included (known issue) |
| Raw Data Exports | 🟢 Included | 🟢 Included |
Quotas
You're only allowed to use a limited amount of Device Attributes or Timeseries. If you exceed the quota, you need to turn off the respective aspect for a different Metric.
To see your quota usage, open your Project's settings page and click on the Quotas tab.

Apart from being limited by quotas, the ingestion of Metrics may be rate-limited. Avoid sending data more than once per hour per device.
To adjust which metrics count against the quotas, open project settings and click on the Metrics tab. Clicking on an individual metric opens the edit window where settings can be adjusted, including how the metric counts against quotas:

First Class Metrics
Memfault has certain first class metrics that will default to being an attribute. First class metrics are metrics that are deemed useful or necessary by the Memfault team and assigned certain defaults for ease of use. These metrics defined by the Memfault SDKs are as follows:
First Class Attribute Metrics List
| String Key | Default Attribute | Default Timeseries |
|---|---|---|
| MemfaultSdkMetric_sdk_version | 🟢 Yes | ⛔ No |
| storage.data.bytes_free.latest | 🟢 Yes | 🟢 Yes |
| storage.data.bytes_used.latest | 🟢 Yes | 🟢 Yes |
| battery_soc_pct | 🟢 Yes | ⛔ No |
| uptime/uptime | 🟢 Yes | ⛔ No |
| Ncs_LteModemFwVersion | 🟢 Yes | ⛔ No |
| version.* (prefix) | 🟢 Yes | ⛔ No |
| sysprop.* (prefix) | 🟢 Yes | ⛔ No |
Archiving & Unarchiving Metrics
If a metric is no longer needed, it can be archived by navigating to Project Settings → Metrics, clicking on the specific metric, and then clicking the Archive button.
To restore a metric, scroll to the bottom of the list of metrics, click on Show archived metrics, and click Restore next to the metric you would like to restore.
Pinned Metrics
The Device Timeline may have a lot of Metrics. In order to focus on certain ones for debugging, you can Pin certain Metrics for your Project. That way, both the load time and the usability of the Device Timeline improves and your team can focus on the relevant/important metrics.
To Pin a Metric, go to Project Settings → Metrics and click on the Pin icon under the "Pin for Everyone" column.
Once you've done that, you can click on "Show only Pinned Metrics" in any Device Timeline to filter down to the most important bits:

Show only Pinned Metrics on a Device Timeline
Troubleshooting
A Metric already exists with the same name
When attempting to create a Metric and one with the same name already exists, regardless of whether it is active or archived, an error will take place.
contact us if you need to re-create the metric with exactly the same name (often in the case of changing the Metric type).