Nordic Bluetooth Quickstart (nRF52/nRF53/nRF54 Series)
This Quickstart Guide gets you up and running on nRF Cloud for observability, crash collection, and OTA updates. This guide is targeted towards Nordic nRF52, nRF53, and nRF54 Series Devices using the nRF Connect SDK (NCS). Through these instructions, we'll help you:
- Set up your development environment with the nRF Connect SDK
- Connect your Device to nRF Cloud
- Build and deploy a firmware update over the air via the nRF Cloud interface
On an nRF51 and/or using the nRF5 SDK? Using a preview nRF54H20 Device? Reach out to us!
Create your nRF Cloud account
Register for an nRF Cloud account to get started. Once registered, select your Nordic chip variant and a Project will be automatically created for you.
Already have an nRF Cloud account without Memfault access? Create a new account or contact us for support.
Create your NRF Connect SDK Workspace
- VSCode
- Command Line
To use the nRF Connect SDK, we will first create an NCS Workspace using Visual Studio Code and the nRF Connect for VS Code Extension Pack. This will contain the configuration and dependencies to work on and build firmware for your devices.
Install Visual Studio Code and nRF Connect Extension Pack
If you do not already have Visual Studio Code installed, please do so.
Then, use the VS Code extension installer link to automatically install the nRF Connect for VS Code Extension pack.
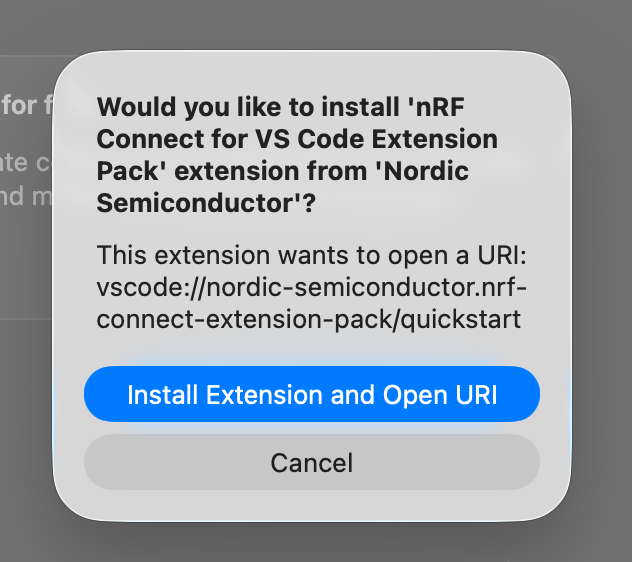
Click "Allow" to open in VS Code, then "Install Extension and Open URI" to
install. VS Code prompt to open the nRF Connect extension link VS Code install dialog for the nRF Connect extension pack
If prompted to trust publishers "Nordic Semiconductor" and "Trond Snekvik",
choose "Trust Publishers & Install" VS Code trust publishers confirmation for Nordic extensions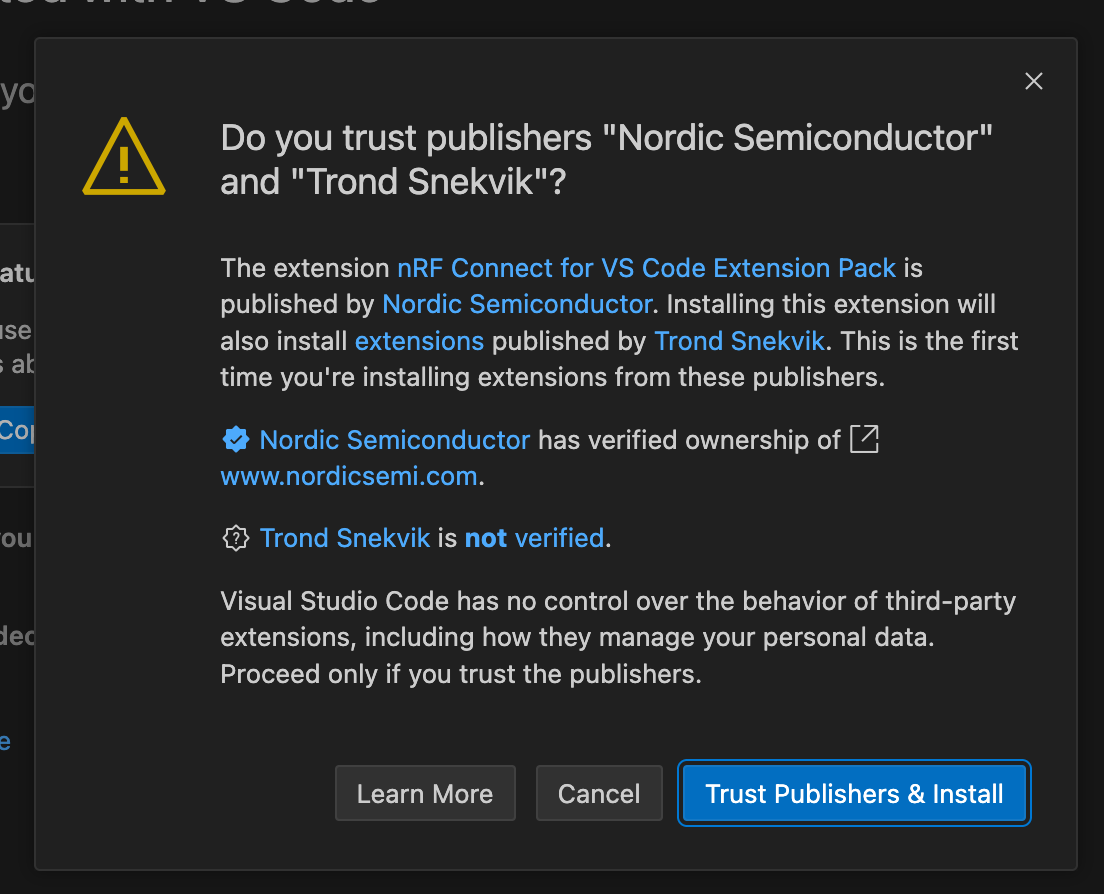
You will then see a series of popups:
- "Allow "Visual Studio Code" to find Devices on local networks?" This lets VS Code see BLE devices. Choose "Allow"
- Support for v1.x toolchains discontinues: choose "OK, do not show again"
- You may choose to enable sending statistics to Nordic Semiconductor or not; this does not affect any of the functionality of the SDK.
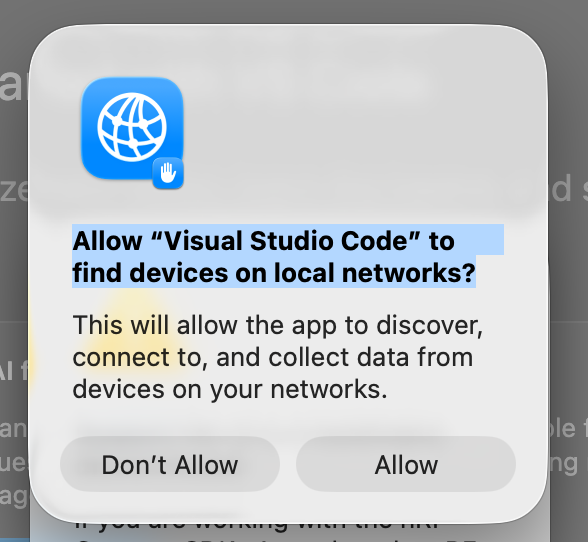
macOS prompt allowing VS Code to find Devices on local networks
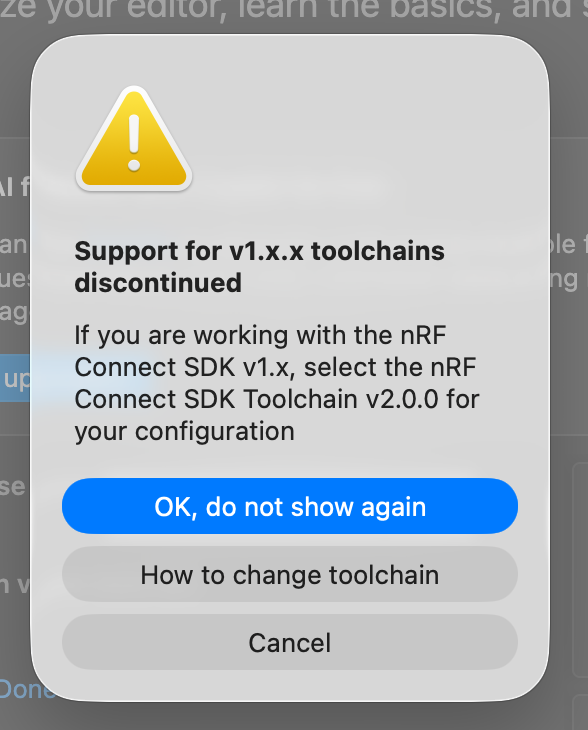
nRF Connect toolchain deprecation warning dialog

Prompt asking to enable statistics sharing with Nordic
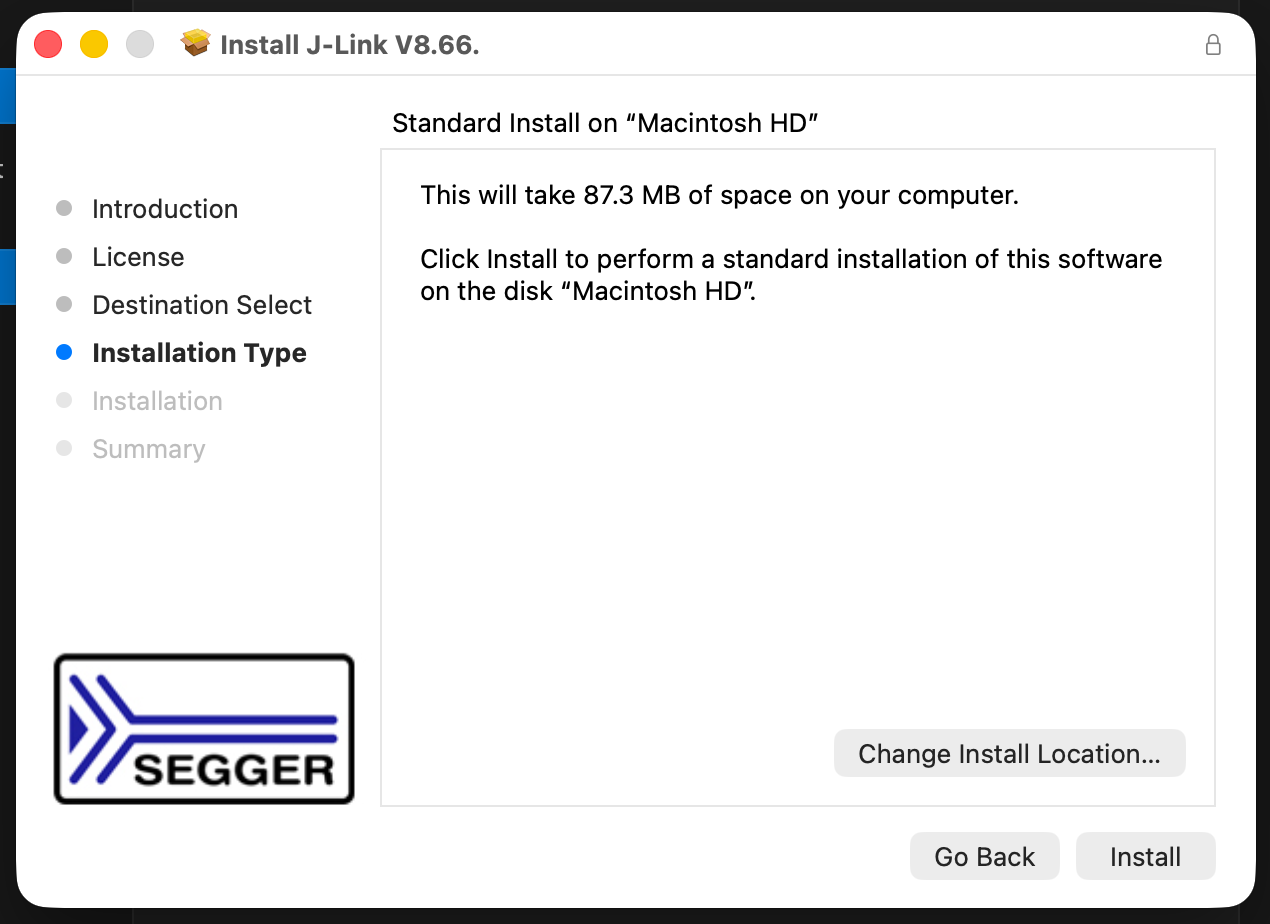
After installation, you may see a prompt to install a version of
Segger, required for debugging. Click
"Download and Install" and proceed through the J-Link installation wizard. If
not, please install manually. nRF Connect prompt to download and install Segger J-Link Segger J-Link installer wizard progress dialog
Install the nRF Connect SDK
In the VS Code sidebar, the nRF Connect icon should be visible and selected. nRF Connect extension icon highlighted in the VS Code sidebar
Choose "Install SDK" from the sidebar, select "nRF Connect SDK", and choose the SDK version you wish to install, i.e. the latest released.
For reference, this Quick Start guide was tested against v3.1.1. nRF Connect Install SDK panel showing available SDK versions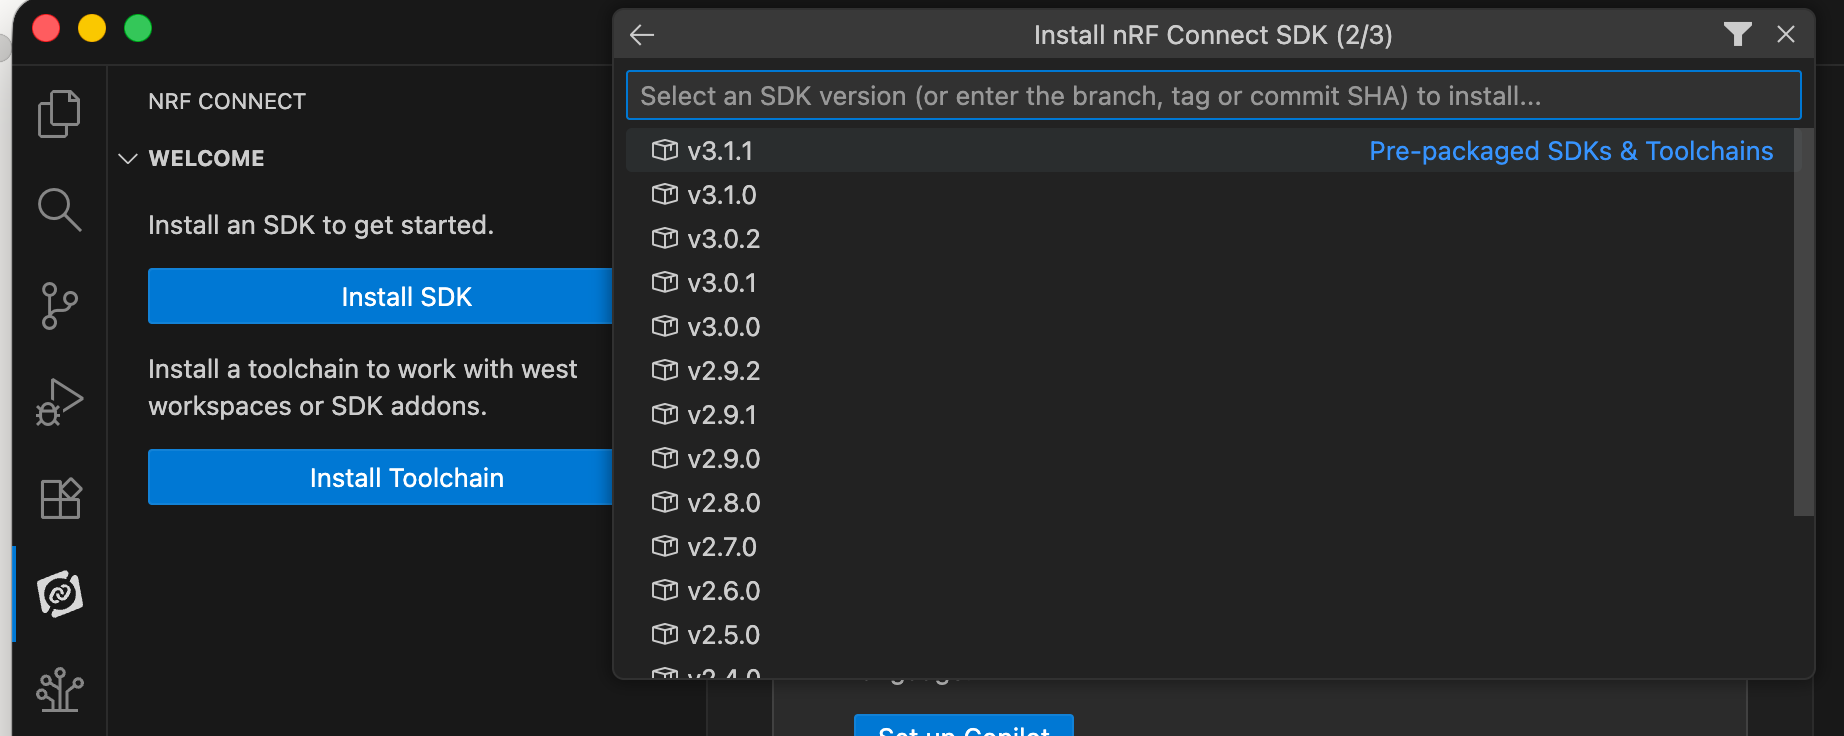
Leave the installation directory as its default, /opt/nordic/ncs/v3.1.1, enter
your admin password if requested and allow installation to continue. This will
take several minutes.
To use nRF Connect SDK from the command line, follow the instructions here, following the "Command line" tabs:
https://docs.nordicsemi.com/bundle/ncs-latest/page/nrf/installation/install_ncs.html
Install version v3.1.1 or later of nRF Connect SDK.
✅ You now have the prerequisite environment configuration to start building and deploying firmware to your Device.
1. Configure Your Project
Now that we have prerequisite tools installed, we can continue with configuring your Project:
We will be using the peripheral_mds example for this guide.
In VS Code, from the nRF Connect sidebar, choose "Browse Samples" and search for
peripheral_mds. Select it and choose "Open" to open the Project. Choose "Yes,
I trust the authors" when prompted.
If not using VS Code, locate the sample in the nRF Connect SDK workspace directory, in this folder:
nrf/samples/bluetooth/peripheral_mds
We will configure this Project to enable four important services in order to be able to use nRF Cloud Services:
- SMP (Simple Management Protocol): for remote management and updating your Device over Bluetooth
- MCUBoot: to install a bootloader and allow your system to install the new image after reboot
- Memfault: to capture crashes and metrics from your firmware
- DIS (Device Information Service): to share with the mobile app some information on the Device (software version, serial number, etc)
Example Board Identifier: This tutorial uses the nRF5340-DK for the example commands. Adjust to your own board specifier where indicated if you are using a different development kit or chipset.
Memfault Project Key: 📝 Before proceeding, find and make note of your nRF Cloud
Memfault Project Key, as it is a required piece of your prj.conf
configuration. You can find this by visiting Settings → General from your nRF
Cloud Project, or by clicking the
Memfault Project Key page link here.
1.1 Update prj.conf
We will now update the sample Project's prj.conf to support connecting to nRF
Cloud. Open prj.conf , located in the root of the peripheral_mds example
folder, and update the following options:
You may replace the entire contents of the file with the below. Update with the required nRF Cloud Project Key and board identifier:
#
# Copyright (c) 2022 Nordic Semiconductor
#
# SPDX-License-Identifier: LicenseRef-Nordic-5-Clause
#

CONFIG_NCS_SAMPLES_DEFAULTS=y

CONFIG_BT=y
CONFIG_BT_SMP=y
CONFIG_BT_PERIPHERAL=y
CONFIG_BT_DEVICE_NAME="Nordic_Memfault"
CONFIG_BT_PRIVACY=y

CONFIG_BT_BAS=y
CONFIG_BT_MDS=y

CONFIG_BT_CTLR_PHY_2M=y
CONFIG_BT_BUF_ACL_RX_SIZE=251
CONFIG_BT_L2CAP_TX_MTU=247
CONFIG_BT_BUF_ACL_TX_SIZE=251
CONFIG_BT_CTLR_DATA_LENGTH_MAX=251

CONFIG_LOG=y
CONFIG_LOG_PRINTK=n
CONFIG_LOG_DEFAULT_LEVEL=2
CONFIG_LOG_MODE_DEFERRED=y
CONFIG_LOG_MODE_OVERFLOW=y
CONFIG_LOG_BACKEND_RTT=n

CONFIG_SHELL=y
CONFIG_SENSOR_SHELL=n
CONFIG_DK_LIBRARY=y

# Heap memory is required for the memfault_demo_cli.c
CONFIG_HEAP_MEM_POOL_SIZE=256

CONFIG_MEMFAULT=y
CONFIG_MEMFAULT_SHELL=y
CONFIG_MEMFAULT_LOG_LEVEL_INF=y

CONFIG_MEMFAULT_NCS_BT_METRICS=y

# Enable bonding
CONFIG_BT_SETTINGS=y
CONFIG_FLASH=y
CONFIG_FLASH_PAGE_LAYOUT=y
CONFIG_FLASH_MAP=y

# --- Memfault configuration ---
# ⚠️ Make sure to update this line with YOUR Project Key from https://mflt.io/project-key!
CONFIG_MEMFAULT_NCS_PROJECT_KEY=""

# SMP is a must
CONFIG_BT_SMP=y

# Enable OTA updates
CONFIG_NCS_SAMPLE_MCUMGR_BT_OTA_DFU=y

# Enable more fields in the nRF Connect Device Manager app view
CONFIG_MCUMGR_GRP_OS_INFO=y

# Device Information Service (required for OTA)
CONFIG_BT_DIS=y
CONFIG_BT_DIS_SERIAL_NUMBER=y
CONFIG_BT_DIS_SERIAL_NUMBER_STR="mfltqs1"
CONFIG_BT_DIS_HW_REV=y
CONFIG_BT_DIS_HW_REV_STR=""  # Set to your board, eg "nrf5340dk"
CONFIG_BT_DIS_SW_REV=y
CONFIG_BT_DIS_SW_REV_STR="main"
CONFIG_BT_DIS_FW_REV=y

# Memfault firmware identification
CONFIG_MEMFAULT_NCS_FW_TYPE="main"
CONFIG_MEMFAULT_NCS_DEVICE_ID_STATIC=y
CONFIG_MEMFAULT_NCS_DEVICE_ID="mfltqs1"

# Set MCUBoot image header version to match DIS and Memfault version
CONFIG_BT_DIS_FW_REV_STR="0.0.1"
CONFIG_MEMFAULT_NCS_FW_VERSION_STATIC=y
CONFIG_MEMFAULT_NCS_FW_VERSION="0.0.1"
CONFIG_MCUBOOT_IMGTOOL_SIGN_VERSION="0.0.1"
If you are updating a different Project, the required fields to add and/or updates are listed below.
# --- Memfault configuration ---
CONFIG_MEMFAULT=y
CONFIG_BT_MDS=y
CONFIG_BT_SMP=y

# Enable shell (optional but useful for testing)
CONFIG_SHELL=y

# ⚠️ Make sure to update this line with YOUR Project Key from https://mflt.io/project-key!
CONFIG_MEMFAULT_NCS_PROJECT_KEY=""

# SMP is a must
CONFIG_BT_SMP=y

# Enable OTA updates
CONFIG_NCS_SAMPLE_MCUMGR_BT_OTA_DFU=y

# Enable more fields in the nRF Connect Device Manager app view
CONFIG_MCUMGR_GRP_OS_INFO=y

# Device Information Service (required for OTA)
CONFIG_BT_DIS=y
CONFIG_BT_DIS_SERIAL_NUMBER=y
CONFIG_BT_DIS_SERIAL_NUMBER_STR="mfltqs1"
CONFIG_BT_DIS_HW_REV=y
CONFIG_BT_DIS_HW_REV_STR=""  # Set to your board, eg "nrf5340dk"
CONFIG_BT_DIS_SW_REV=y
CONFIG_BT_DIS_SW_REV_STR="main"
CONFIG_BT_DIS_FW_REV=y

# Memfault firmware identification
CONFIG_MEMFAULT_NCS_FW_TYPE="main"
CONFIG_MEMFAULT_NCS_DEVICE_ID_STATIC=y
CONFIG_MEMFAULT_NCS_DEVICE_ID="mfltqs1"

# Set MCUBoot image header version to match DIS and Memfault version
CONFIG_BT_DIS_FW_REV_STR="0.0.1"
CONFIG_MEMFAULT_NCS_FW_VERSION_STATIC=y
CONFIG_MEMFAULT_NCS_FW_VERSION="0.0.1"
CONFIG_MCUBOOT_IMGTOOL_SIGN_VERSION="0.0.1"
Update Board Identifier: Make sure to update your board's identifier and your nRF Cloud Memfault Project Key as appropriate before proceeding.
1.2 Enable MCUBoot
Additionally, create a new file containing only the following line, to enable the MCUBoot bootloader:
SB_CONFIG_BOOTLOADER_MCUBOOT=y
Save this to the peripheral_mds folder as sysbuild.conf.
2. Build and Flash
- VSCode
- Command Line
First, we will build the firmware. Returning to the nRF Connect extension from
your sidebar, create a build configuration by clicking "Add Build Configuration" Add Build Configuration button in the nRF Connect extension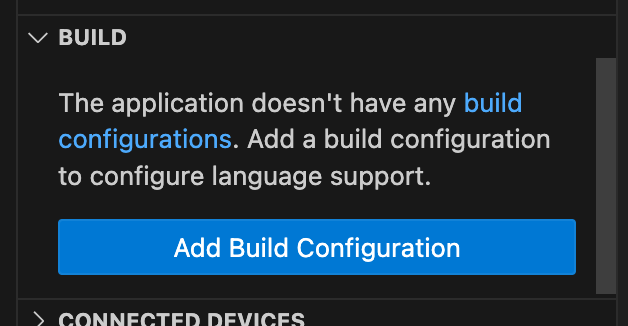
The only things we need to update in the build configuration is the Board target
and to ensure we are using sysbuild. Make sure that it is configured for your
specific board, then scroll down and click "Generate and Build". Build configuration form with board target selection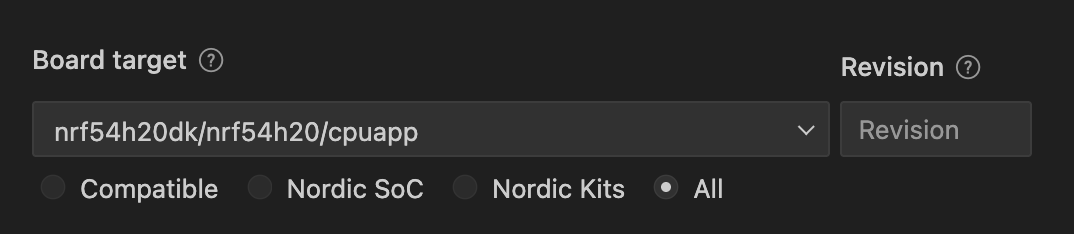
Then, scroll down to the bottom of the build configuration and change "System
build (sysbuild)" to "Use sysbuild". Sysbuild option toggled to Use sysbuild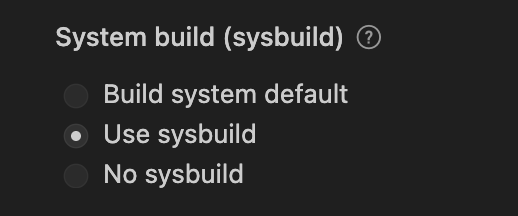
Click "Generate and build". This will take a few minutes.
selected under Applications section showing the build target selectedperipheral_mds, like so: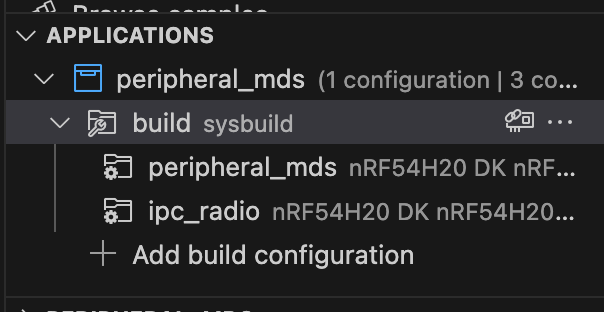
Next, connect your Device to your development machine via its DEBUGGER port. Make sure to power on the Device (many have a small toggle switch marked POWER near the USB port). If your operating system prompts you to allow a Device to connect, do so.
You will see your Device in the nRF Connect extension if you expand the section titled "Connected Devices". If you do not, click the refresh icon.
Now, under the section titled "Actions", click "Flash". This will flash the
firmware to your connected Device. Flash action button highlighted in the nRF Connect Actions panel
Troubleshooting If you have errors building or flashing, make sure you updated
prj.conf with your Memfault Project Key, and that your board identifier is
configured in prj.conf and your build configuration.
Finally, under "Connected Devices", expand your Device and choose its first
serial port to open a serial terminal using the "plug" icon. Connected Devices panel with serial terminal plug icon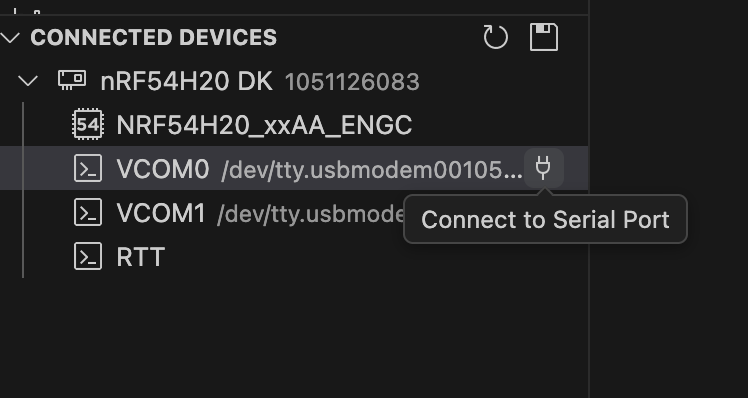
While the terminal is open, hit "reset" on your Device. You should see messages
indicating that it has been reset, Bluetooth is initialized and the Device is
advertising for connections: Serial terminal output showing reset and Bluetooth advertising logs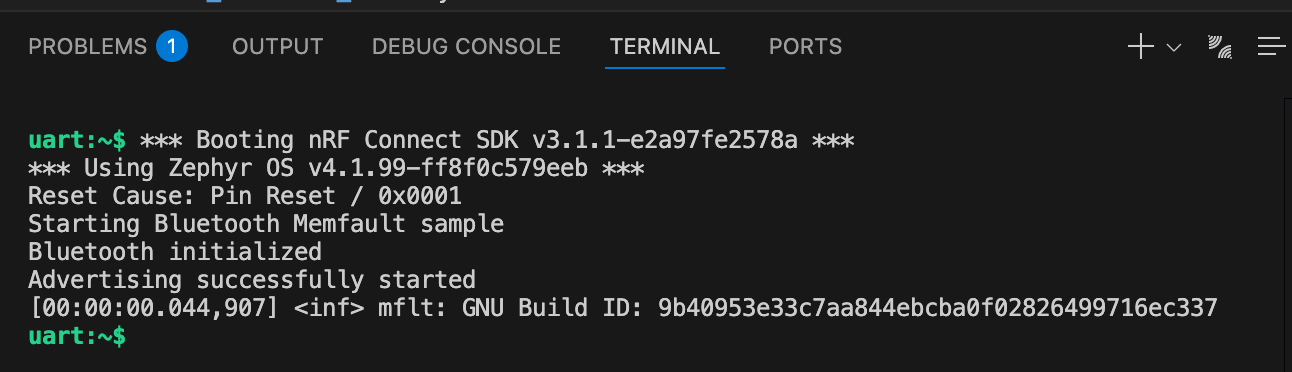
First, open a terminal and navigate to your nRF Connect SDK workspace directory,
To build and flash, first connect your board with the debugger USB connection.
Then run these two commands, substituting your board identifier if necessary:
west build --sysbuild --pristine=always --board nrf5340dk/nrf5340/cpuapp nrf/samples/bluetooth/peripheral_mds
west flash --erase
Verify the device is advertising by opening a serial terminal to view the device output (webserial terminal if you don't have a local one handy):
Bluetooth initialized
Advertising successfully started
✅ Congratulations! You've manually flashed v0.0.1 to your Device. Next, we'll set up Memfault on your Device to deliver further updates over the air and enable sending Metrics and Trace data in the future.
Connect and Send Data
In order to properly decode your Device data, we first need to upload Symbol
files to nRF Cloud for this firmware. In nRF Cloud, navigate to
Software → Symbol Files and upload
zephyr.elf located in your build folder, i.e.
/opt/nordic/ncs/v3.1.1/nrf/samples/bluetooth/peripheral_mds/build/peripheral_mds/zephyr/zephyr.elf.
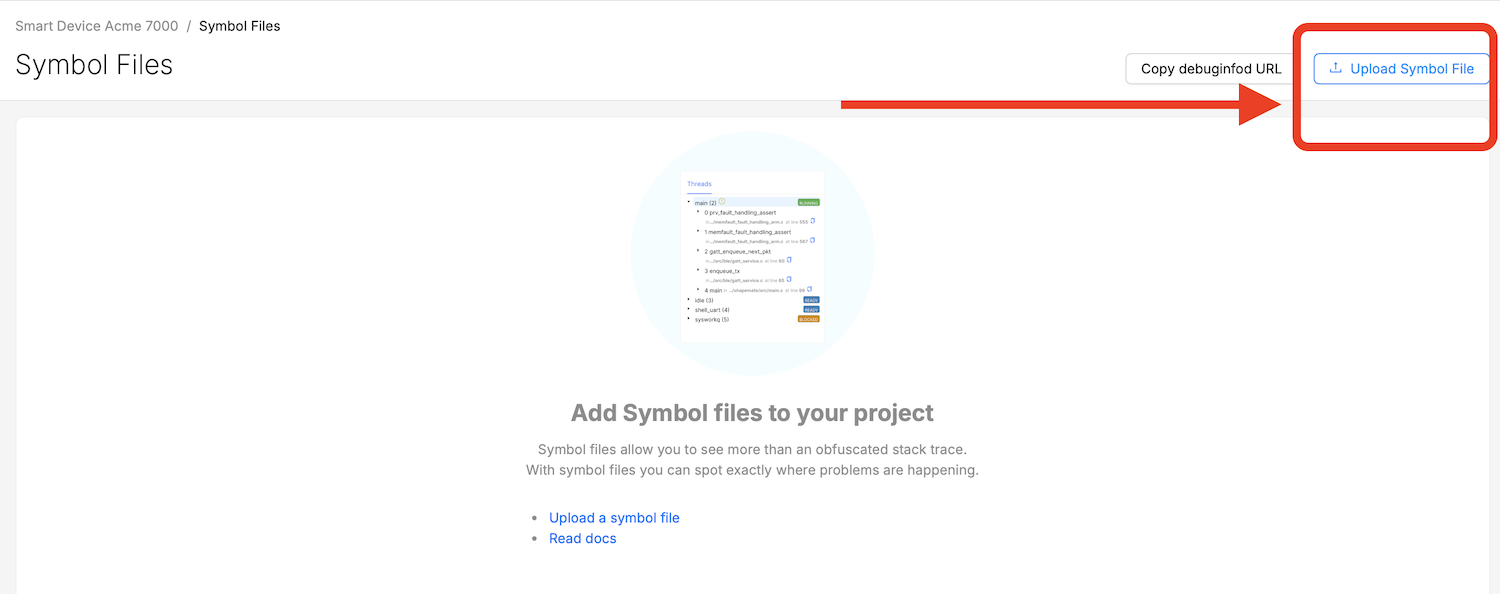
nRF Cloud Symbol Files page ready for upload
Install nRF Connect Device Manager
A Bluetooth Device will typically communicate with nRF Cloud via a gateway. In this instance, we will use the nRF Connect Device Manager installed on a mobile Device.
Download and install the nRF Connect Device Manager app for your appropriate platform. To quickly open the app store links on your mobile Device, scan the QR codes below.
iOS - Apple App Store

QR code link to the iOS nRF Connect Device Manager app
Android - Google Play Store
QR code link to the Android nRF Connect Device Manager app
3. Connect Your Device
Next, we will connect your Device to the nRF Connect Device Manager gateway application and ensure that it is streaming data to nRF Cloud:
- Open the nRF Connect Device Manager app and allow it a moment to scan for Devices.
- Select your Device from the list. If using the default configuration
above, it will be titled
Nordic_Memfault. - Use the "Echo" feature to send a message of "Hello" to your Device to
ensure a connection is initiated.
- If your Device requires a PIN for a pairing request, it will be visible via a serial terminal connection.
- If you are having trouble connecting to your Device, "forget" the Device's entry from your phone's Bluetooth settings and try again.
- Tap the tab labeled "Logs and Stats" or "Diagnostics" (depending on your
platform). You should see both
Status: Awaiting New Chunksand/or a message such asUploaded: 2 chunk(s), 152 bytes.
✅ Success! Data is being automatically uploaded to nRF Cloud via the Memfault Diagnostic Service (MDS) when connected to this gateway application.
Verify Data Reception
Back in nRF Cloud, visit Integration Hub → Processing Log to confirm data is flowing.
You should see a listing for the last event received, the time at which it was
received, and the serial number for the sending Device (in this configuration,
mfltqs1 as was defined in our prj.conf as
CONFIG_BT_DIS_SERIAL_NUMBER_STR).

nRF Cloud Processing Log showing received events
✅ You now have flashed firmware to your Device and can see its events in nRF Cloud.
4. Test OTA Update
While we have flashed our Device via USB, the full value of nRF Cloud comes from combining observability with Over-the-Air updates. Let's configure this now.
Create a New Firmware Version
Now, we will prepare your configuration to build a new firmware version.
First, update the following three software version strings in prj.conf in the
same peripheral_mds sample.
CONFIG_BT_DIS_FW_REV_STR="0.0.2"  # Increment version
CONFIG_MEMFAULT_NCS_FW_VERSION="0.0.2"  # Keep in sync with the above
CONFIG_MCUBOOT_IMGTOOL_SIGN_VERSION="0.0.2" # Keep in sync with above
Next, build an updated binary for your firmware, by choosing the "Build" action from the nRF Connect extension.
Finally, we will upload our 0.0.2 build and Symbols to nRF Cloud and prepare it for Release to our Fleet.
First, choose "OTA Release" from the sidebar and create a new Release,

nRF Cloud OTA Releases page with Create Release button
Give this a version number of 0.0.2

Release creation modal specifying firmware version 0.0.2
From the Release details, add an OTA payload to this Release

Release details view prompting to add an OTA payload
Choose your board identifier as the hardware type (i.e. nrf54h20dk), and
main as Software Type, then upload your 0.0.2 build. It will have been
generated as dfu_application.zip, located in the peripheral_mds build
directory, i.e.
/opt/nordic/ncs/v3.1.1/nrf/samples/bluetooth/peripheral_mds/build/
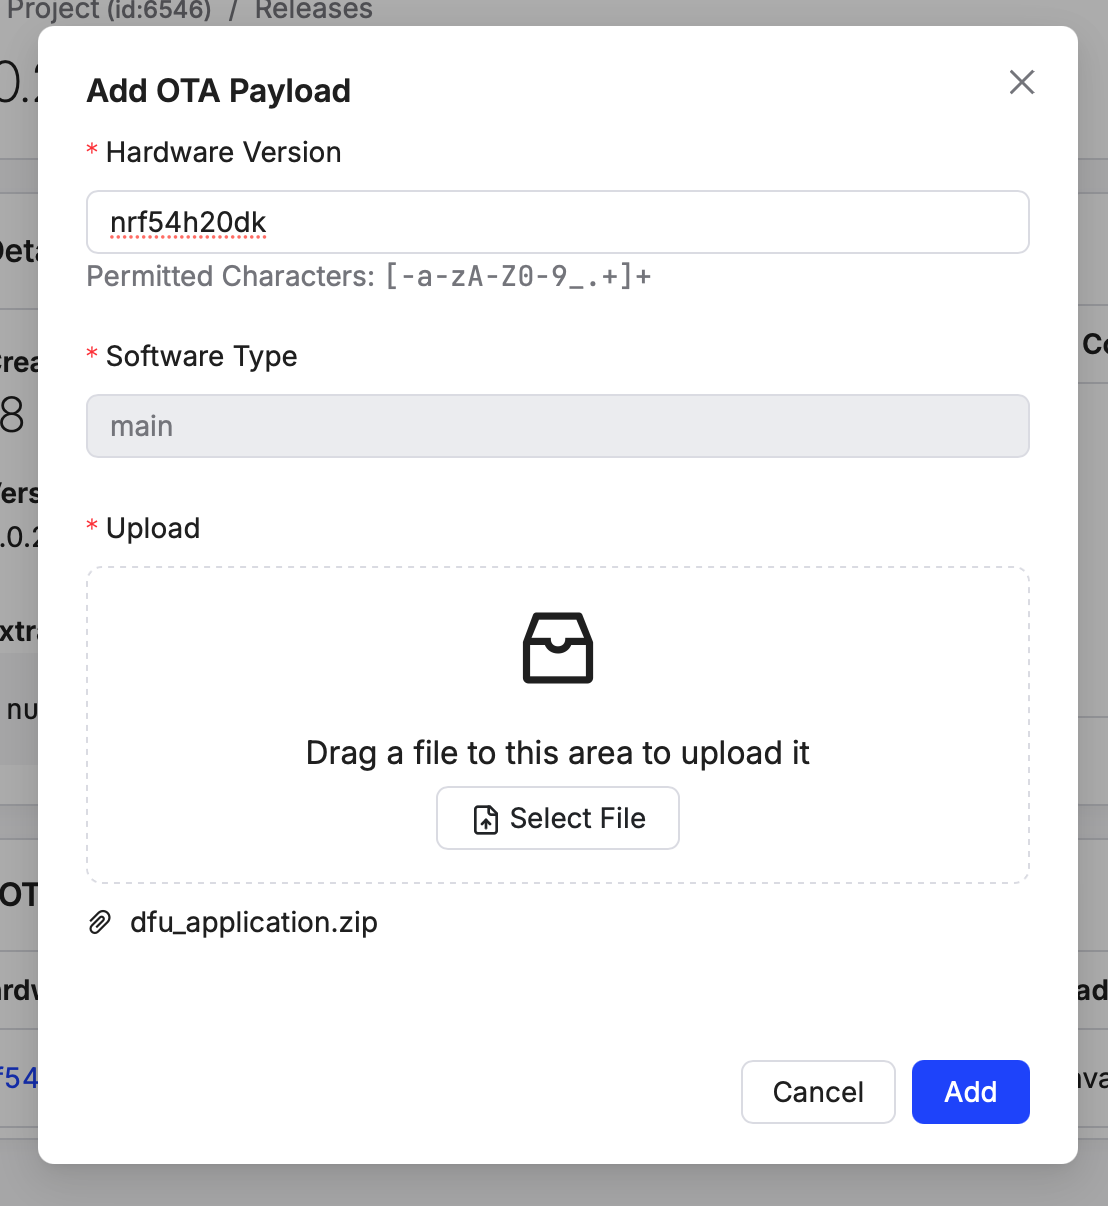
Upload dialog selecting board type and DFU ZIP
Next, upload the Symbol Files for this build, zephyr.elf, located in the
zephyr directory, i.e.
/opt/nordic/ncs/v3.1.1/nrf/samples/bluetooth/peripheral_mds/build/peripheral_mds/zephyr/
, in the same way you did for 0.0.1.
✅ Fantastic! Our firmware and Symbols are now uploaded to nRF Cloud and ready to deploy to your Fleet (for now, one Device).
Activate the Release
We will now activate the Release so that it is available for your Fleet.
- In nRF Cloud, visit Software → Releases
- Choose the new version number from the version list
- Click the Activate button in the top right
- Choose
defaultfor the target Cohort, and aNormalrollout - Click Activate to activate the deployment!
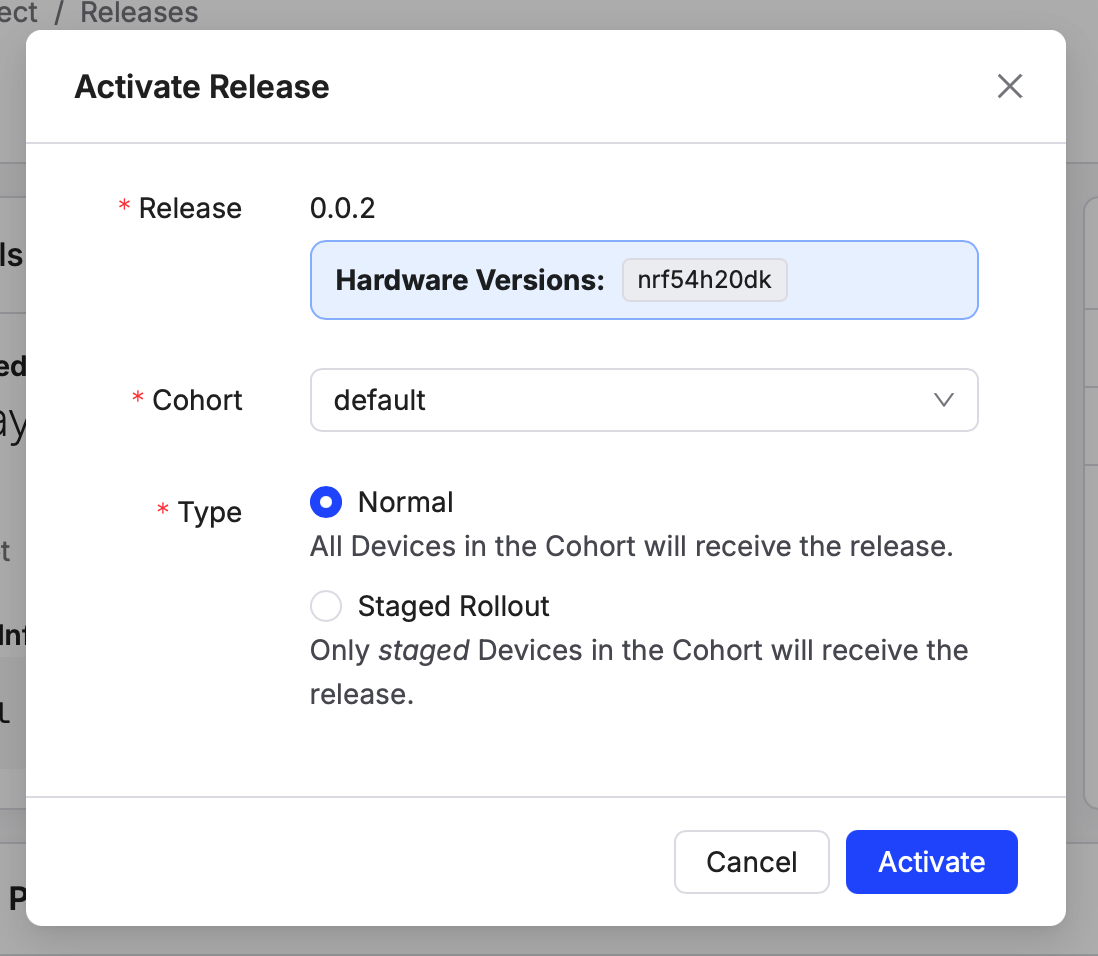
Release activation dialog targeting the default Cohort
✅ The Release is now activated and available for Devices that check in and request their latest available version.
Install Your Update
We will now initiate a connection to your Device so it can install the latest update.
First, open the nRF Connect Device Manager app on your mobile Device. Choose
your nRF Device Nordic_Memfault from the list of Devices.
- Navigate to the "Image tab"
- Tap "Check for Updates" to have the gateway application request the latest version for your Device
Device Manager mobile app Image tab showing Check for Updates
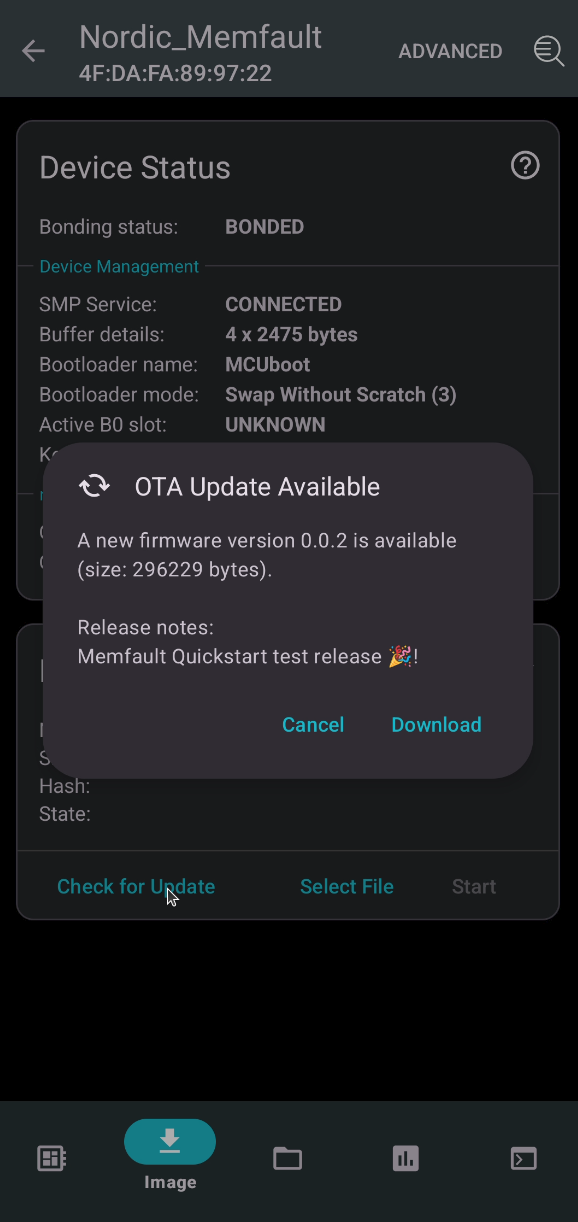
Your Device will request its latest firmware and you will see a message "OTA Update Available".
- Tap "Download" to download the firmware to your mobile Device and prepare for installation.
- Once downloaded, tap "Start" to begin installing the new firmware.
- Choose "Confirm Only" and allow the upgrade process to begin.

Device Manager mobile app downloading and starting the update
When the new firmware has been installed you will see State: UPLOAD COMPLETE
If you check for updates again, you should see a message that your Device is already up to date:
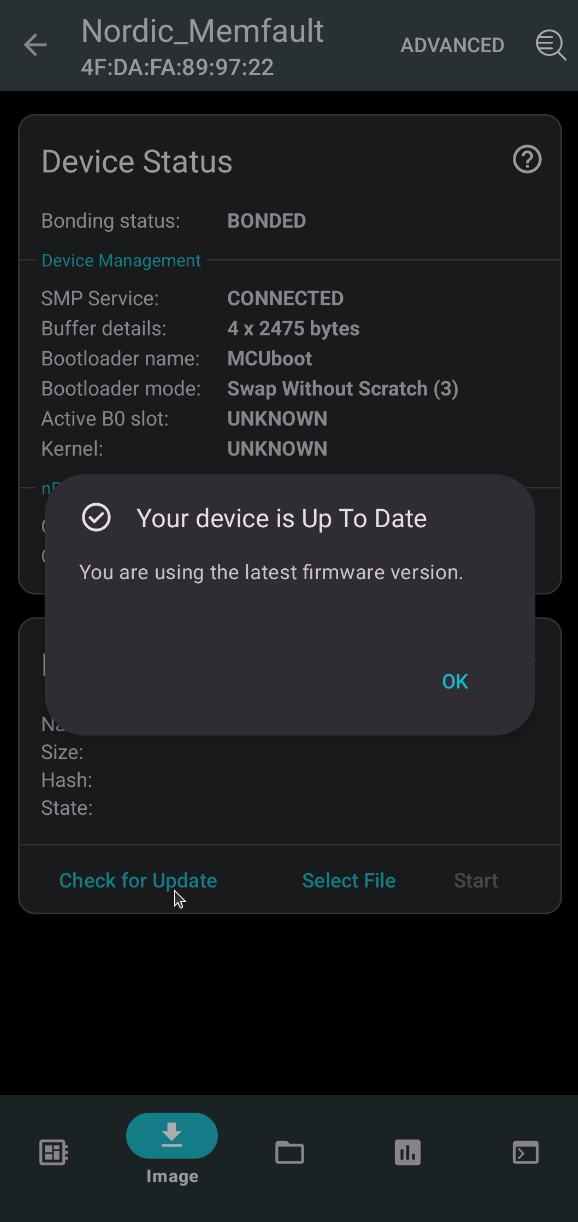
Device Manager mobile app indicating the Device is up to date
✅ Success! You have now built firmware, uploaded it to nRF Cloud powered by Memfault, and deployed it to your Device!
Verify Your Device
Your Device has now received and installed update firmware and is reporting observability data to nRF Cloud, sending metrics automatically every hour. Let's confirm that we can see the Device and its data:
Go to Fleet → Devices and click on your Device's serial number (in the example, mfltqs1) to see the Device Details page.

nRF Cloud Device details page showing firmware version
This will show the current version (0.0.2), and when it was last seen (likely just a few minutes ago since the Device rebooted after the update.
Navigating to the Timeline tab, you can see additional information about this Device, which will continue to be updated over time including:
- Software version and update history
- Reboot events and reasons
- Metrics like battery, connectivity, performance
- Traces including any crashes

nRF Cloud Device timeline with metrics, Traces, and reboots
Crash Reporting
Now that the Device is receiving OTA updates and reporting metrics, we can simulate a crash to see how nRF Cloud provides symbolicated stack Traces for your devices.
From your serial console, you can execute the Memfault UART shell extension to trigger a crash:
uart:~$ mflt test assert
The Device will crash, reboot, and automatically upload the Coredump to nRF Cloud.
Using the nRF Device Manager app, you can tap "Update" to trigger an upload to nRF Cloud, forwarding new diagnostic data to the system.
In nRF Cloud, visit Issues to see the symbolicated crash with full stack Trace.

nRF Cloud Issues page displaying a symbolicated crash
Success!
Congratulations, you now have:
- ✅ Observability - Device metrics, crashes, and reboots
- ✅ OTA Updates - Remote firmware deployment
- ✅ Fleet Management - Centralized Device monitoring
Now you are ready to move on to integrating nRF Cloud into your own firmware. Below are some considerations to make when moving into production:
- Device Serial Numbers: Use unique serials from manufacturing
- Cohort Management: Organize Devices for staged rollouts
- Custom Metrics: Track application-specific KPIs
- Advanced Configuration: Security, logging, and optimization
Advanced Guides
For more advanced topics and deeper dives, please refer to our documentation, including:
- Custom Metrics API - Track your KPIs
- Coredump Analysis - Deep dive debugging
- Releases Integration - CI/CD automation
- Best Practices - Production deployment
Appendix: Troubleshooting
- If you are having pairing Issues: Erase the board from the "Connected Device" section of the nRF Connect extension to clear BLE bonds.
- If no data appears to be reaching nRF Cloud: Verify Project Key and MDS service is enabled.
- If you experience build errors, refer to the compatibility requirements
Need help? contact us