ARM IAR Getting Started Guide
This tutorial will go over integrating the panics component of the Memfault Firmware SDK into a system using ARM IAR C/C++ Compiler.
Clone Memfault SDK
Using a Git client, clone the memfault-firmware-sdk
repository from:
$ git clone https://github.com/memfault/memfault-firmware-sdk.git
Add required Memfault SDK include paths to target
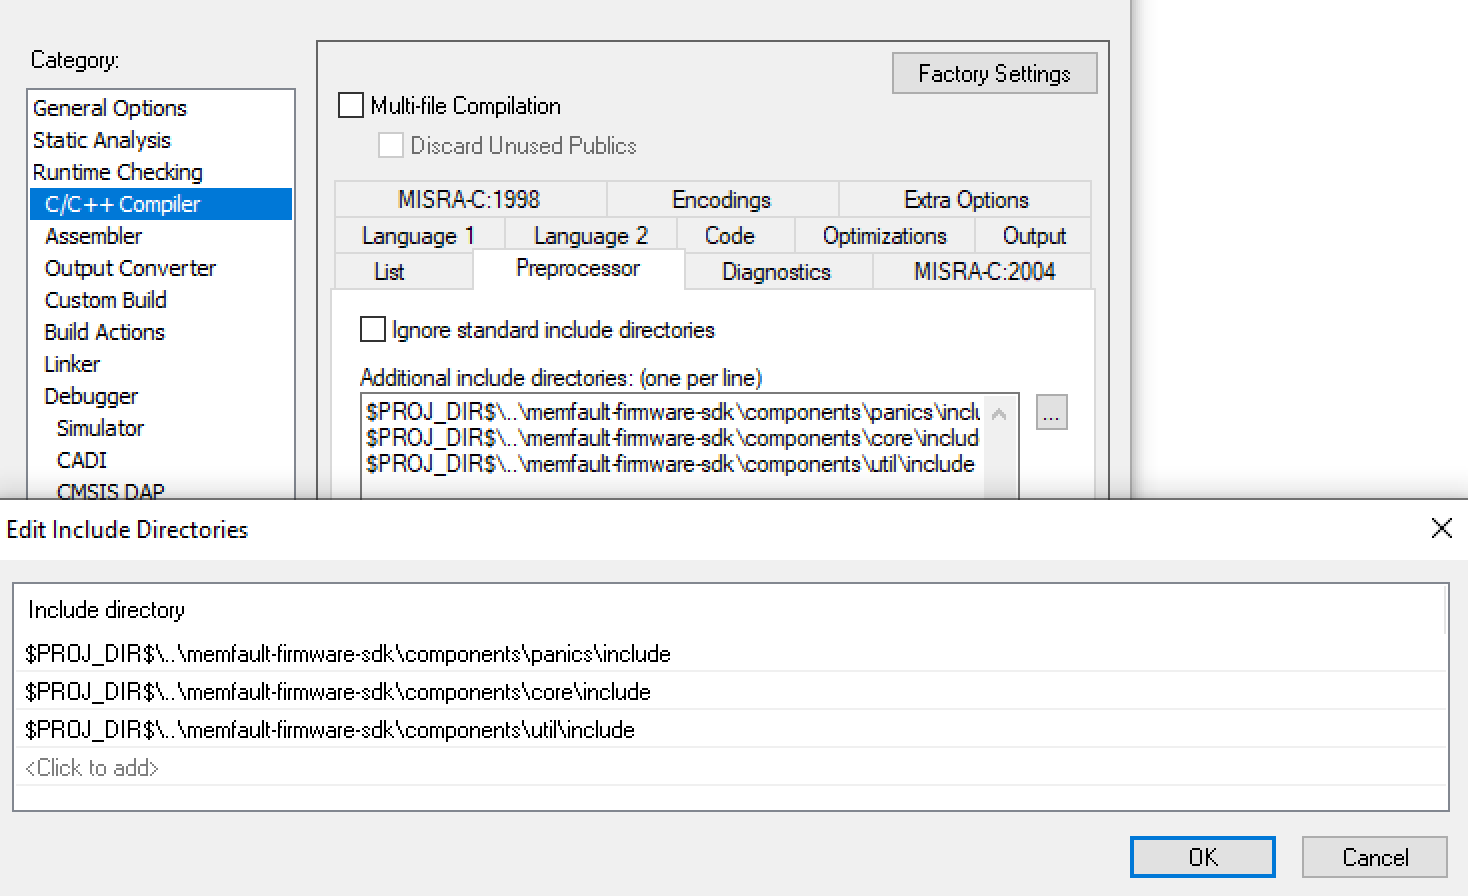
Right click on your Project and select "Options". Navigate to C/C++ Compiler and
select the "Preprocessor" tab. Add
$MEMFAULT_FIRMWARE_SDK/components/[panics, core, util]/include (one for each
component we will be working with) to the build system:
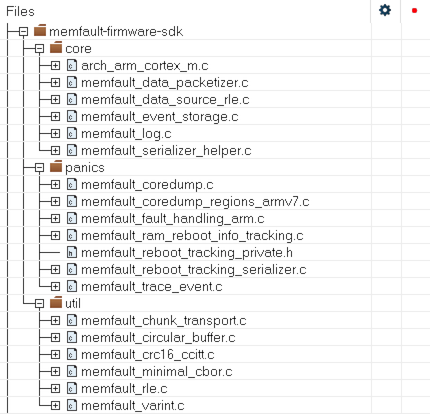
Add required Memfault SDK sources to target
Add the sources at $MEMFAULT_FIRMWARE_SDK/components/[panics, core, util]/src
to your project. For the panics component, you do not need to add
memfault_fault_handling_xtensa.c. The directories included should look
something like:
Implement platform specific storage region for crash data
We typically recommend starting with the RAM based Coredump port. By default this will only save the top of the stack at the time of crash but it lets you quickly get the system up and running and get a feel for how things work. To do this:
-
Add
ports/panics/src/memfault_platform_ram_backed_coredump.cto the build -
Mark the section being used as a
noinitregion in the.icffor the target. The line you need to add will look something like:do not initialize { rw section .noinit.mflt_coredump };
Coredump data can also be stored to any other backing storage (eMMC, external NOR flash, internal flash, etc) by implementing the required dependencies.
Implement other platform dependencies
In order to save coredumps, you will need to fill in the functions in the block below
#include "memfault/panics/assert.h"
#include "memfault/core/platform/core.h"
#include "memfault/core/platform/debug_log.h"
#include "memfault/core/platform/device_info.h"

void memfault_platform_log(eMemfaultPlatformLogLevel level, const char *fmt, ...) {
  // Hook up logging implementation
}

void memfault_platform_get_device_info(sMemfaultDeviceInfo *info) {
  // platform specific version information
  *info = (sMemfaultDeviceInfo) {
    .device_serial = "DEMOSERIAL",
    .software_type = "nrf-main",
    .software_version = "1.0.0",
    .hardware_version = "nrf-proto",
  };
}

void memfault_platform_reboot(void) {
  // Last function called before memfault after a crash
  // expect the platform to reboot the system
  __asm("bkpt 1");
}
Publish data to the Memfault cloud
Extensive details about how data from the Memfault SDK makes it to the cloud can be found here. In short, all data is published via the same "chunk" REST endpoint.
#include "memfault/core/data_packetizer.h"
// [...]

bool try_send_memfault_data(void) {
  // buffer to copy chunk data into
  uint8_t buf[USER_CHUNK_SIZE];
  size_t buf_len = sizeof(buf);

  bool data_available = memfault_packetizer_get_chunk(buf, &buf_len);
  if (!data_available ) {
    return false; // no more data to send
  }

  // send payload collected to chunks/ endpoint
  user_transport_send_chunk_data(buf, buf_len);
  return true;
}

void send_memfault_data(void) {
  // [... user specific logic deciding when & how much data to send
  while (try_send_memfault_data()) { }
}