Location Services Quickstart
This guide explains how to authenticate requests to nRF Cloud Location Services using an Organization Auth Token (OAT).
If you are an nRF Cloud customer who previously used a Service Token or Evaluation Token, see the Migration Guide for detailed, step-by-step instructions (with screenshots).
Organization Auth Tokens replace the legacy nRF Cloud Service Tokens and Evaluation Tokens, which are deprecated.
Prerequisites
- Both a nRF Cloud and a Memfault account which are linked. This is the default. If you do not believe you have a Memfault account or they are not linked, please contact us to resolve the issue.
- Admin access in the linked Memfault organization. See Access Control: Teams & Roles.
Step 1: Log in to nRF Cloud
Go to nRF Cloud and sign in with your nRF Cloud credentials.
Once signed in, you'll land on the nRF Cloud dashboard.
Step 2: Open the Memfault dashboard from nRF Cloud
In the left sidebar of nRF Cloud, click the Memfault item (it shows the Memfault logo). This takes you to the nRF Cloud by Memfault dashboard via single sign-on.
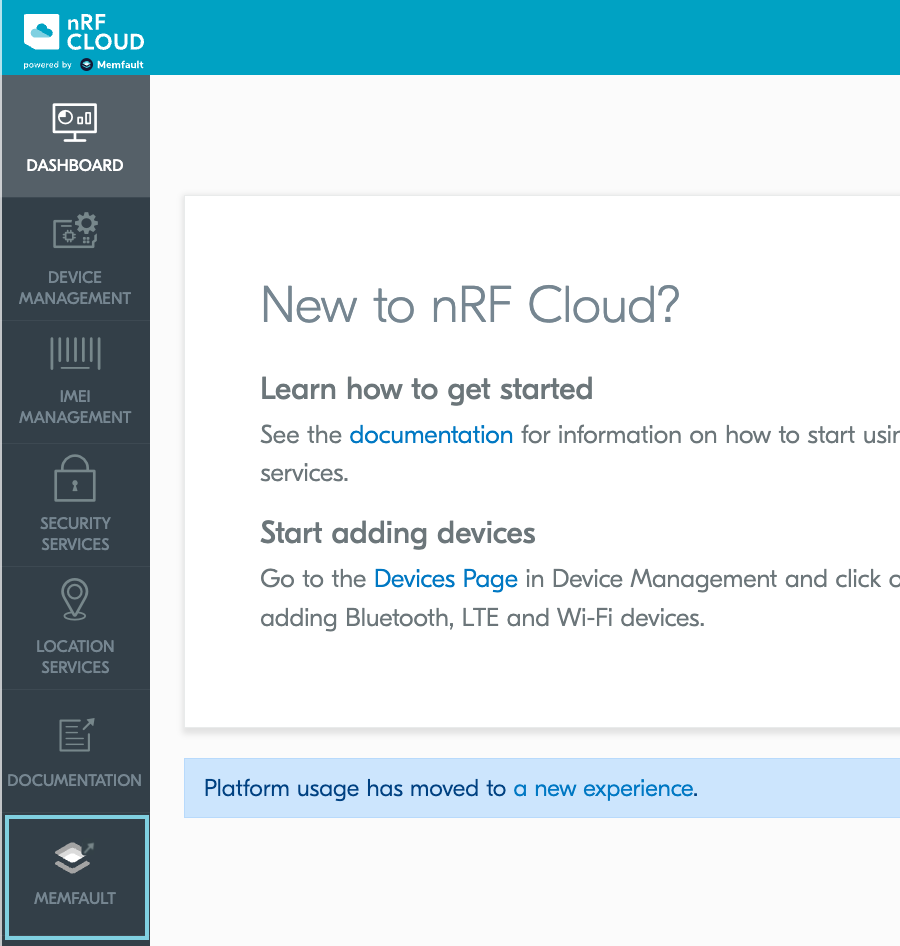
You'll briefly see a "Redirecting to Memfault" splash screen, then arrive at the Memfault dashboard for the organization that corresponds to your nRF Cloud team.
If your nRF Cloud team was created before the nRF Cloud integration, you may see a one-time prompt to link or create a nRF Cloud organization. Accept the prompt to continue. The resulting nRF Cloud organization will share the name of your nRF Cloud team and contain a default project named nRF Project.
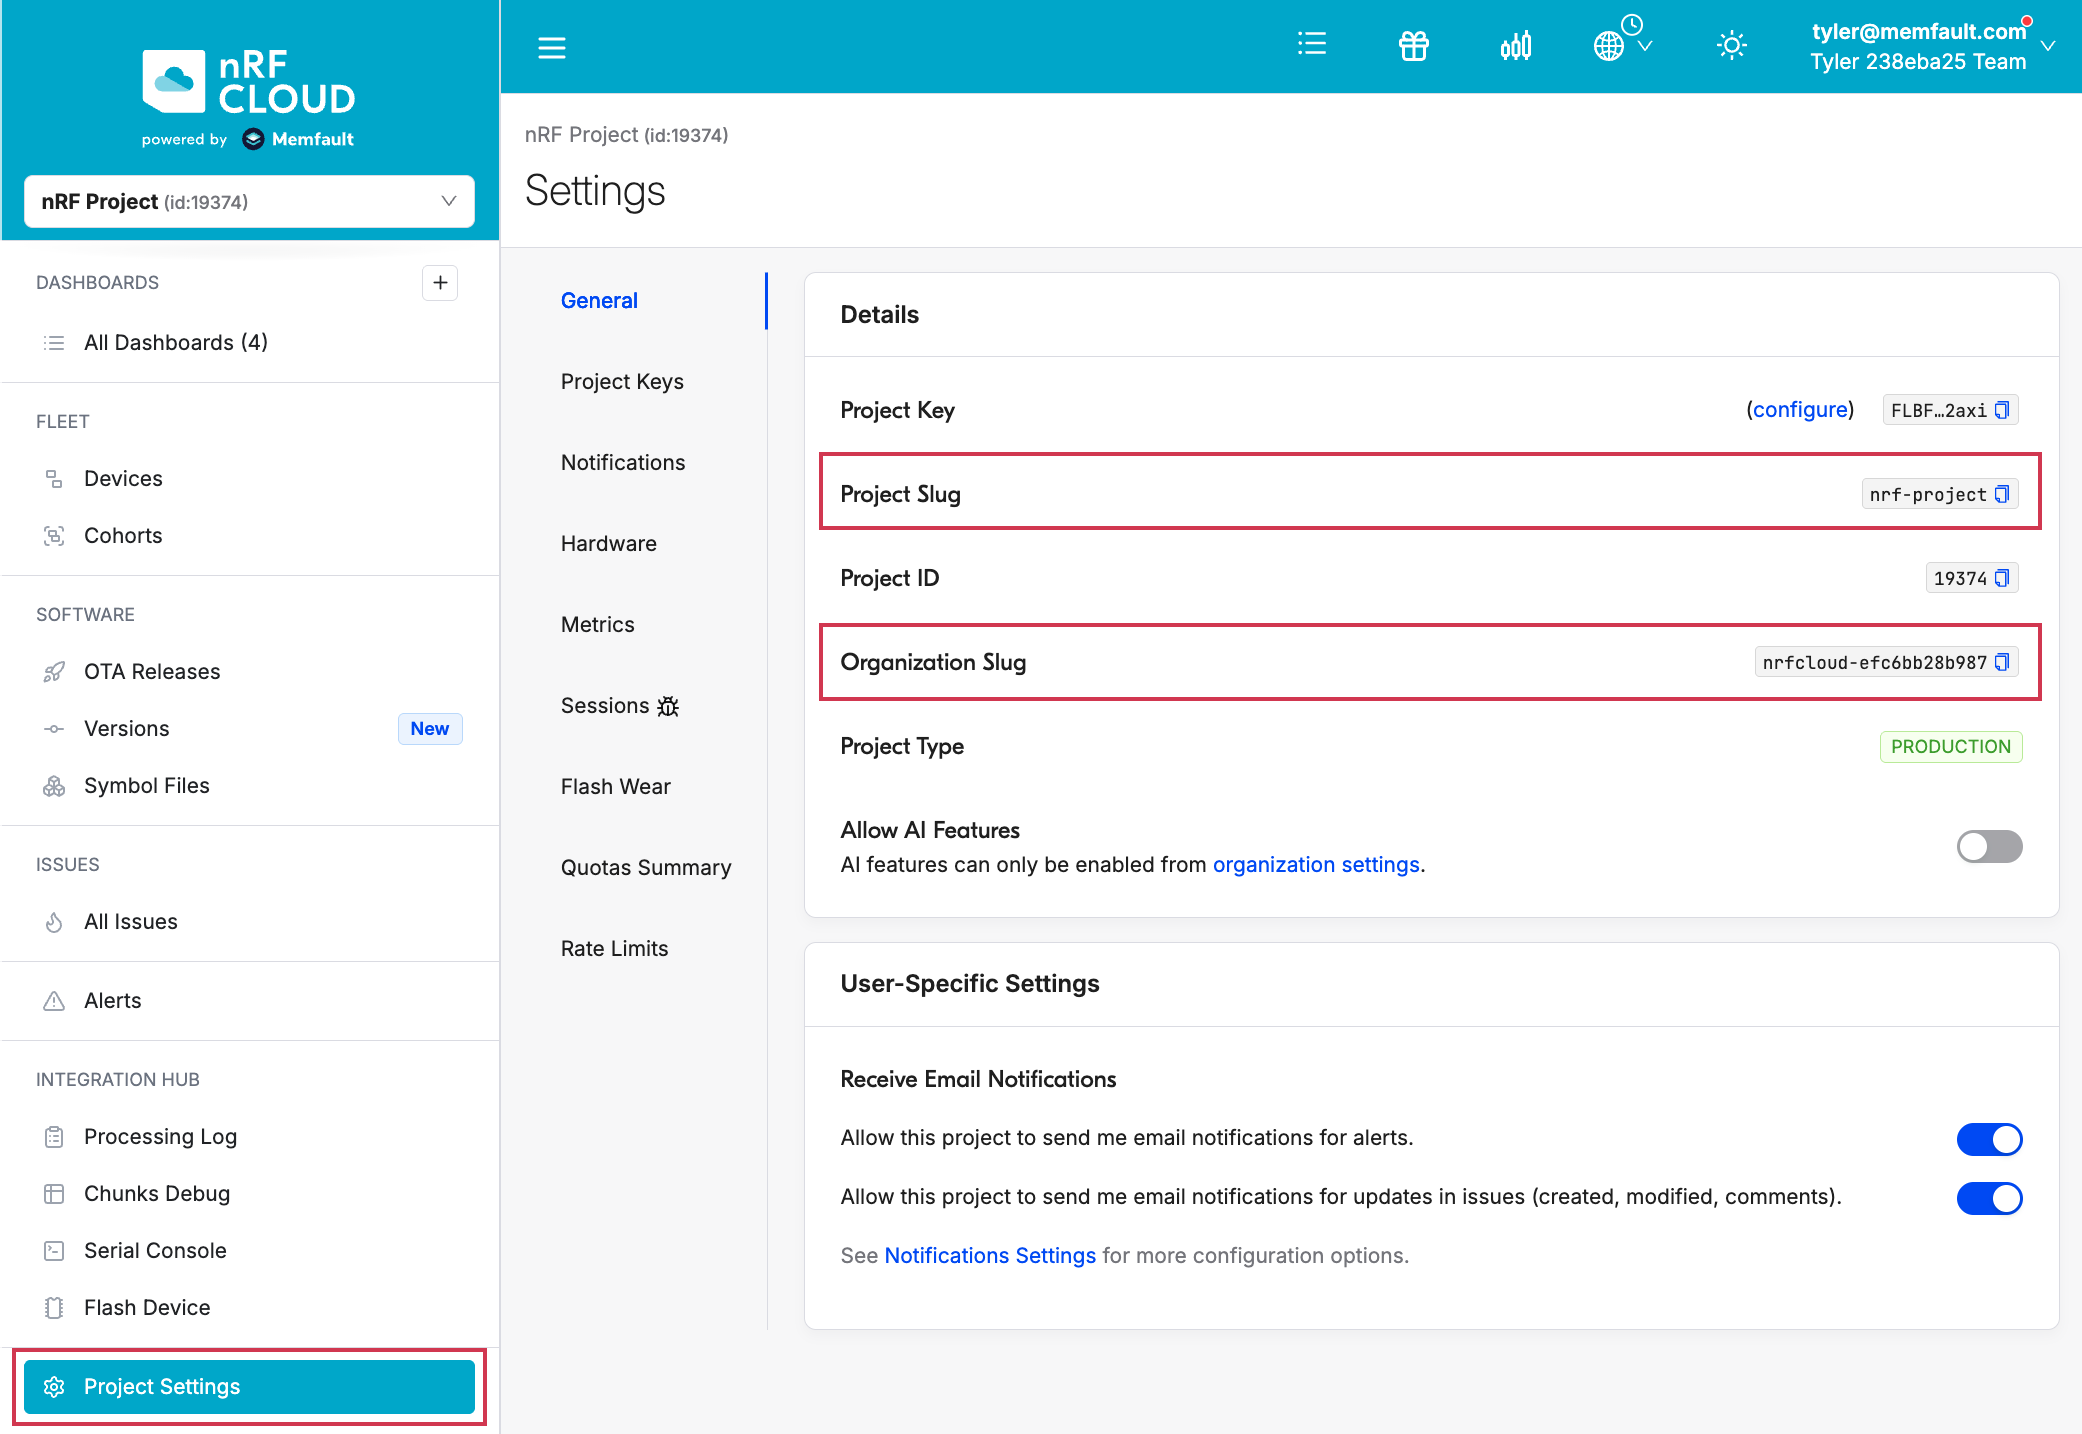
Step 3: Find your Organization and Project slugs
Memfault structures your teams and devices in Organizations and Projects. You'll need both the Organization slug and Project slug to construct Location Services API URLs.
In the left sidebar, click Project Settings → General. Copy the Organization Slug and Project Slug values from the Details panel.
Step 4: Create an Organization Auth Token
Now we need to create an OAT.
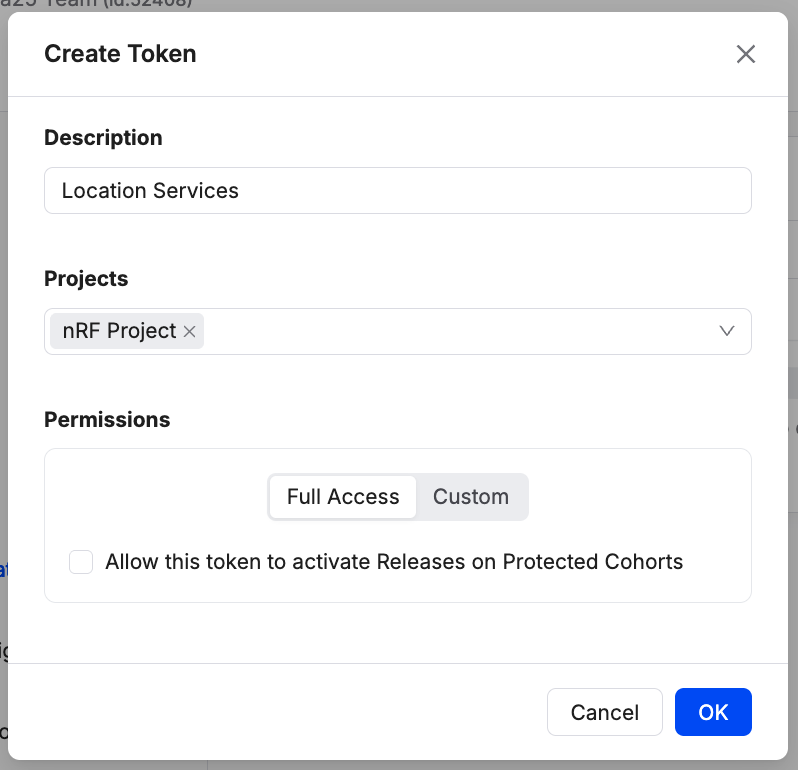
From the left sidebar, click Admin, open the Organization Auth Tokens tab, and click Create Token.
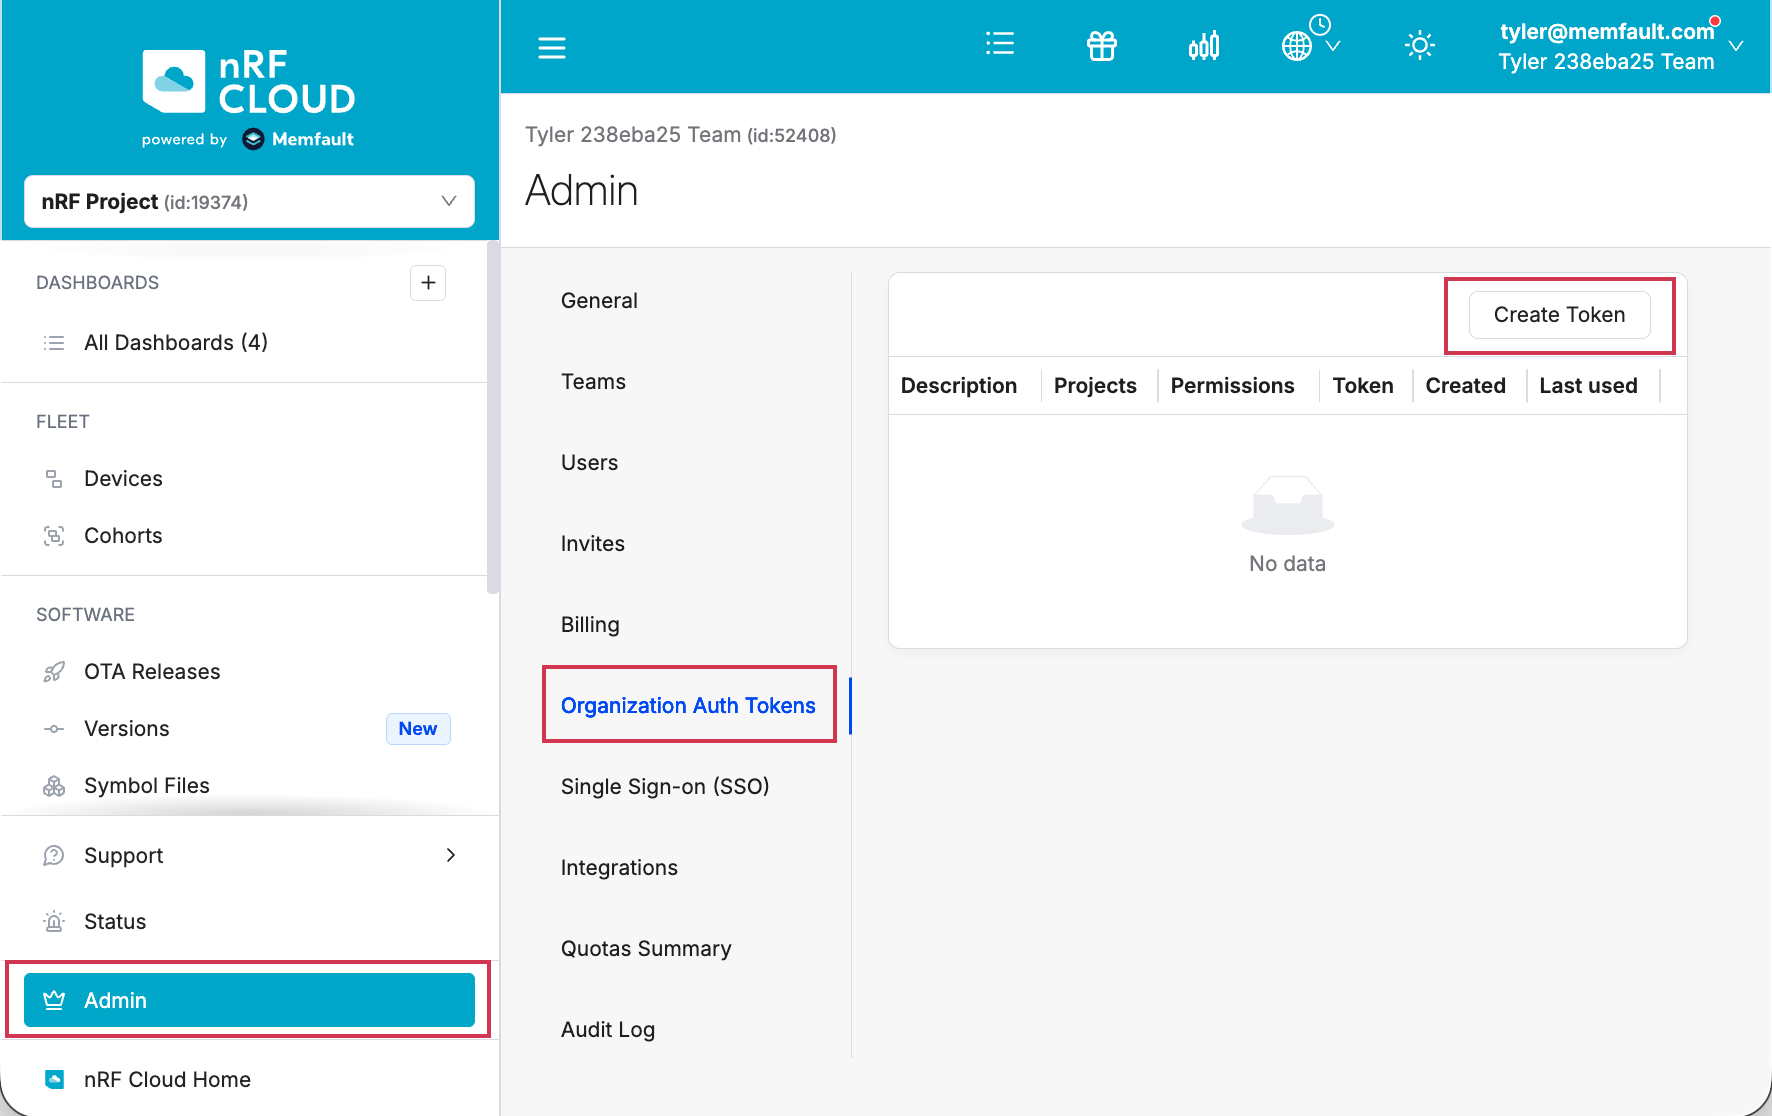
Enter a description (for example, Location Services) and click Create.
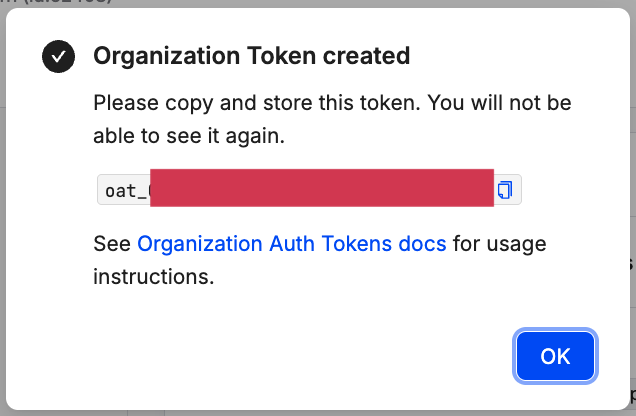
Copy the token immediately and store it somewhere secure. nRF Cloud will not display the secret value again.
For more details on OATs, see Organization Auth Tokens.
Do not commit OATs to source control or paste them into chat. They grant the same permissions as an Organization Admin would have via the API.
Step 5: Make a Location Services request
Use the OAT in the Authorization header when calling nRF Cloud Location
Services REST endpoints. The token is sent as a Bearer token.
The base URL for Location Services endpoints is:
https://api.nrfcloud.com/v1/organizations/<YOUR_ORG>/projects/<YOUR_PROJECT>/location
Replace <YOUR_ORG> with your Organization Slug (from Step 3) and
<YOUR_PROJECT> with your Project Slug.
Example: Wi-Fi location
For example, for an Organization with slug acme-inc, Project slug shapemate,
and the OAT stored in the environment variable $NRFCLOUD_OAT, the following
would be the request:
curl -v -X POST \
  https://api.nrfcloud.com/v1/organizations/acme-inc/projects/shapemate/location/wifi \
  -H "Authorization: Bearer $NRFCLOUD_OAT" \
  -H "Content-Type: application/json" \
  -d '{
    "accessPoints": [
      {
        "macAddress": "30:86:2d:c4:29:d0",
        "signalStrength": -45
      },
      {
        "macAddress": "3c:37:86:5d:75:d4",
        "signalStrength": -45
      }
    ]
  }'
A 200 OK response with a JSON body containing lat/lon confirms that your
OAT and slugs are working.
Next steps
- If you have existing devices or services using a Service Token or Evaluation Token, follow the Migration Guide to switch them over.
- See the nRF Cloud Location Services API reference for the full list of endpoints (Wi-Fi, cellular, A-GNSS, P-GPS).